 United States
Vape Tank Anatomy: A Beginner’s Guide to Every Part and What It Does
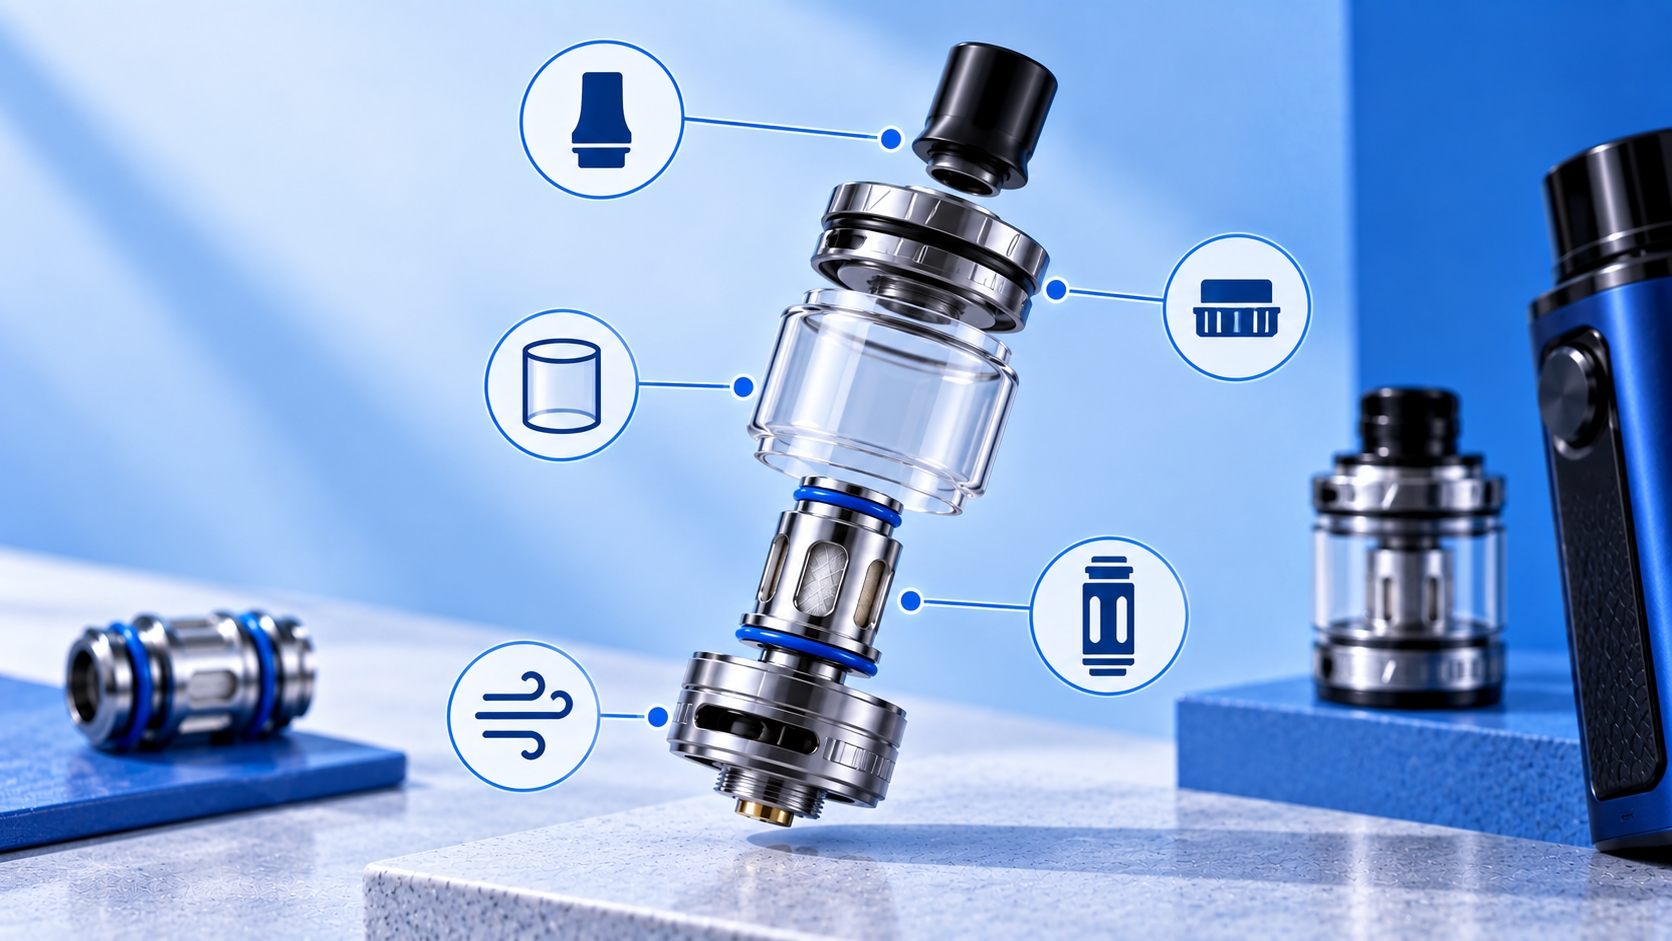
This guide is intended for adult users of legal purchasing age. Vape tank construction varies by manufacturer and model, so use your device manual or manufacturer specifications when identifying, replacing, or assembling components.
A vape tank can look like one complete piece, but it's actually a system of smaller components working together. The mouthpiece provides the point of inhalation, the reservoir holds e-liquid, the coil heats it, and seals and connection points help keep everything assembled and functioning as intended.
Understanding these parts makes it easier to identify what you're looking at when cleaning a tank, replacing a coil, checking compatibility, or following your device manual.
Not every tank uses exactly the same construction, but the following components are common across many refillable vape tanks.
Vape Tank Anatomy at a Glance
Depending on the design, a vape tank may include:
- Drip tip or mouthpiece
- Top cap
- Fill port
- E-liquid reservoir
- Chimney
- Coil or coil head
- Wicking material
- Airflow control
- O-rings and seals
- Tank base
- Device connection
Some of these parts may be integrated rather than separately removable, particularly on compact or simplified designs.
1. Drip Tip or Mouthpiece
The drip tip, commonly called the mouthpiece, is the upper part of the tank through which vapor is inhaled.
Drip tips can differ in width, height, material, and connection design. Some are removable and replaceable, while others are integrated into the top section of the tank.
A wider or narrower mouthpiece can contribute to how open or restricted the airflow feels, although the overall draw depends on the complete tank and airflow system rather than the mouthpiece alone.
2. Top Cap
The top cap forms the upper section of many vape tanks. It helps close the reservoir and, on many refillable designs, provides access to the fill port.
Manufacturers use several top-cap mechanisms. Depending on the tank, the cap may unscrew, slide, twist, or use another locking design.
Because these mechanisms vary, avoid forcing a top cap that does not open easily. The manufacturer's instructions should show the correct filling and opening method for the exact tank.
3. Fill Port
The fill port is the opening used to add e-liquid to a refillable tank.
Many modern tanks use top-fill systems, although the location and design of the opening vary. Some fill ports are exposed after removing or sliding the top cap, while others use a membrane or seal around the opening.
The fill port should not automatically be confused with the tank's central airflow or chimney opening. Follow the manufacturer's filling instructions to identify the correct opening.
4. E-Liquid Reservoir
The reservoir is the section that holds the tank's e-liquid supply.
Depending on the tank, the reservoir may use glass or another manufacturer-selected material. Its capacity and construction vary by model and region.
The transparent portion found on many tanks allows you to see the approximate amount of e-liquid remaining without opening the tank.
5. Chimney
Inside many tanks is a central passage commonly called the chimney. It forms part of the vapor path between the coil area and the mouthpiece.
The exact structure differs between tanks, but its basic role is separate from that of the surrounding reservoir: the reservoir stores e-liquid, while the internal vapor path directs vapor toward the mouthpiece.
This distinction is particularly useful when learning how a tank is filled because pouring e-liquid into an unintended central opening can interfere with normal operation.
6. Coil or Coil Head
The coil is the heating assembly responsible for converting supplied e-liquid into aerosol when the device is activated.
Many modern tanks use replaceable pre-built coil heads. These units typically combine the heating element, wicking material, housing, and connection points into one replaceable component.
Coils are not universally interchangeable. A tank normally supports specific coil families and resistance options identified by the manufacturer. Vape.com's vape coil guide explains coil types, resistance, and selection in more detail.
7. Wicking Material
Inside the coil assembly is wicking material, commonly made from cotton or another material specified by the manufacturer.
Its role is to draw e-liquid from the surrounding reservoir toward the heating element. The liquid held in the wick is then heated when the device is activated.
On pre-built coil heads, the wick is normally part of the complete replaceable coil rather than a separate user-replaceable tank component.
8. Airflow Control
Many tanks include an airflow control that regulates how much air can enter the system during a draw.
A common design uses an adjustable ring with openings around the base or upper portion of the tank. Rotating the ring changes how much of those openings are exposed.
More open airflow generally produces a less restricted draw, while reducing the opening creates a more restricted draw. The exact effect depends on the tank, coil, power setting, and overall airflow design.
9. O-Rings and Seals
O-rings and seals are small components, but they play an important role in keeping sections of the tank properly sealed.
They may be positioned around the glass, top cap, base, coil connection, or other joining surfaces depending on the design.
A seal that is missing, damaged, pinched, or installed incorrectly can affect how the tank closes and may contribute to leakage. Replacement seals should match the manufacturer's specifications for the tank.
10. Tank Base
The base forms the lower portion of many vape tanks and can serve several functions depending on the design.
It may support the coil, contain airflow openings, hold seals, and provide the connection between the tank and the device.
On some tanks, removing the base provides access to the replaceable coil. On others, the coil is installed or removed using a different mechanism.
11. The 510 Connection
Many traditional tanks connect to a compatible mod using a threaded connection commonly known as a 510 connection.
This connection provides the mechanical and electrical interface between the tank and device. However, having a 510 connection does not automatically mean every 510 tank is appropriate for every mod.
Tank diameter, coil resistance, operating power, device limits, and manufacturer specifications still need to be considered. Vape.com's compatibility guide covers those checks separately.
How the Parts Work Together
Although each tank component has its own role, the system works as a whole.
- The reservoir holds the e-liquid.
- The wick draws e-liquid toward the heating element.
- The coil heats the supplied liquid when the device is activated.
- Incoming airflow moves through the tank according to its design.
- The resulting aerosol travels through the internal vapor path toward the mouthpiece.
- O-rings and seals help keep the assembled tank sealed at its joining points.
- The base and connection help secure the tank and provide its interface with the device.
This is a simplified overview. Internal airflow paths and component arrangements vary considerably between tank designs.
Quick Guide to Vape Tank Parts
| Tank Part | Main Function |
|---|---|
| Drip Tip | Mouthpiece used for inhalation |
| Top Cap | Closes the upper tank and may provide filling access |
| Fill Port | Opening used to add e-liquid |
| Reservoir | Stores e-liquid |
| Chimney | Forms part of the internal vapor path |
| Coil | Contains the heating assembly |
| Wick | Supplies e-liquid to the heating element |
| Airflow Control | Regulates incoming airflow |
| O-Rings | Help seal joining surfaces |
| Tank Base | Supports lower tank components and connection |
| 510 Connection | Connects many traditional tanks to compatible devices |
Which Vape Tank Parts Are Usually Replaceable?
Replaceable components depend entirely on the tank design. Common examples can include the coil head, glass section, drip tip, and certain seals, but this should not be assumed for every tank.
When replacing a component, use the exact tank model rather than appearance alone to identify the correct part. Similar-looking glass, coils, seals, and mouthpieces can use different dimensions or connections.
If a replacement part is not explicitly listed as compatible with your tank, check the manufacturer's documentation before installing it.
Why Knowing Vape Tank Anatomy Helps
Learning the names of the main tank parts makes manufacturer instructions and product specifications much easier to understand.
If instructions tell you to inspect an O-ring, remove a coil head, close a fill port, adjust an airflow ring, or clean the 510 connection, you'll know which part of the tank they are referring to.
It also helps separate a component problem from a broader tank problem. A worn coil, damaged seal, cracked reservoir, or connection issue can involve different parts even when the symptoms appear similar.
Bottom Line
A vape tank is a collection of components rather than a single part. The reservoir stores e-liquid, the wick supplies it to the coil, the coil provides the heating function, the airflow system controls incoming air, and the chimney and mouthpiece form part of the path toward the user.
Meanwhile, smaller components such as O-rings, the tank base, fill-port seals, and connection points help keep the complete assembly working as designed.
Once you understand those basic parts, reading a tank diagram, identifying replacement components, and following manufacturer instructions becomes much easier.
Tank construction and terminology can vary between manufacturers and models. Refer to the current manual or official manufacturer specifications for the exact component names, assembly instructions, compatible replacement parts, and operating requirements of your tank.