A Complete Guide to Prevent Burnt Hits and Extend Coil Life
You’ve just installed a fresh coil, eager to enjoy rich, flavorful clouds — but after a few puffs, all you get is a harsh burnt taste.
Sound familiar?
That frustrating experience happens when vapers skip a crucial step: priming vape coils. Whether you’re new to vaping or a seasoned enthusiast, learning how to prime a vape coil properly can completely change your experience.
A well-primed coil doesn’t just prevent burnt hits — it enhances flavor intensity, improves vapor production, and extends coil longevity. In this guide, we’ll show you exactly how to do it right.
Quick Navigation
- What Is Coil Priming?
- The Science Behind Priming Vape Coils
- How to Prime Vape Coil Properly (Step-by-Step)
- Common Coil Priming Mistakes to Avoid
- Advanced Coil Priming Techniques
- How Proper Priming Extends Coil Life
- Frequently Asked Questions (FAQs)
- Conclusion: Make Every Coil Count
What Is Coil Priming?
Coil priming is the process of saturating your vape coil’s cotton wick with e-liquid before using it for the first time. Most coils use cotton wicking material, which must be fully soaked to prevent dry hits or burnt cotton taste.
When you prime a coil, you’re ensuring that the wick is fully saturated so it can absorb e-liquid efficiently once heat is applied. Think of it as prepping your coil for optimal flavor performance — just like letting your coffee grounds bloom before brewing for the best taste.
Skipping priming means your coil’s dry cotton will burn on the first puff, leading to permanent coil degradation and an awful taste.
The Science Behind Priming Vape Coils
When you press your vape’s fire button, the coil heats up instantly. If the cotton wick isn’t soaked, it scorches instead of vaporizing e-liquid — causing that infamous burnt coil taste.
A properly primed coil ensures that:
-
E-liquid absorbs evenly across the wick (no dry spots)
-
Vapor production stays consistent and smooth
-
The coil maintains a safe temperature, preventing damage
-
Flavors taste richer and cleaner from the first puff
Priming isn’t just a beginner tip — it’s the foundation for optimal vaping performance and longer coil life.
How to Prime Vape Coil Properly (Step-by-Step)
Follow these steps to prime your vape coil and enjoy better flavor right away:
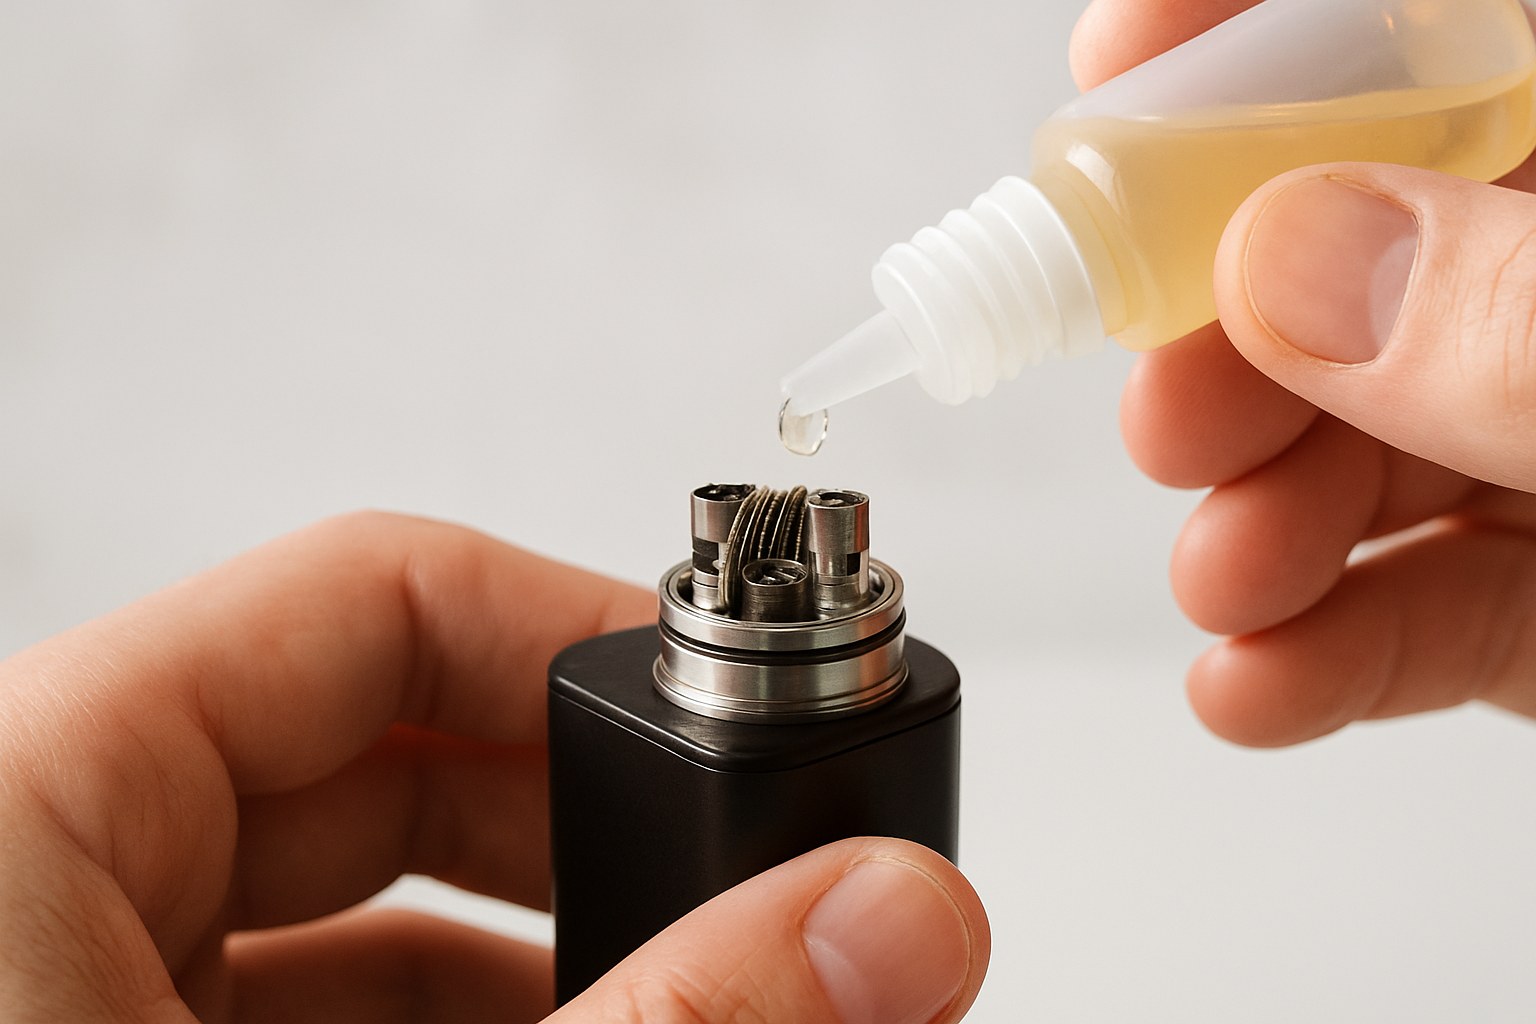
Step 1: Apply E-Liquid Directly to the Coil
Locate the visible cotton through the coil’s wicking ports. Apply several drops of your e-liquid directly until the cotton looks wet and darkened.
Typically, 4–6 drops per port is enough — don’t flood it.
Step 2: Install the Coil and Fill the Tank
Once the cotton looks saturated, install the coil into your vape tank and fill it with your e-liquid.
Let it sit for 5–10 minutes so the liquid can reach the inner parts of the wick.
Using high-VG e-liquids (70% VG or more)? Wait 15–20 minutes instead, since thicker liquids absorb slower.
Step 3: Start with Low Wattage
After soaking, take a few primer puffs (inhale without firing your device). Then, start vaping at the lowest wattage recommended for your coil.
Gradually increase power over several puffs — this “breaks in” your coil for smoother, more flavorful vapor.
Common Coil Priming Mistakes to Avoid
Even experienced vapers fall into these traps:
-
Rushing the process – Firing your coil too soon can scorch the cotton.
-
Under-saturating the wick – Adding just a few drops isn’t enough.
-
Ignoring the break-in period – Start low, then slowly increase wattage.
-
Using thick e-liquid too soon – High-VG juices need extra soaking time.
-
Chain vaping immediately – Let the wick re-saturate between hits to avoid dry spots.
Avoiding these coil priming mistakes will save you from burnt hits and wasted coils.
Advanced Coil Priming Techniques
Once you’ve mastered the basics, try these advanced priming methods for even better performance:
-
The Painting Method – Use a small brush or swab to “paint” e-liquid evenly on exposed cotton.
-
Vacuum Priming Method – After filling your tank, close the airflow and take a few strong pulls without firing. This draws e-liquid deeper into the wick faster.
-
Temperature Control Priming – If your vape supports TC mode, use it during your first tank to prevent overheating during the break-in period.
-
Pre-Soaking the Coil – For maximum saturation, submerge your coil in e-liquid for 10–15 minutes before installation.
These techniques help ensure full wick saturation, minimize dry hits, and extend coil longevity — especially for mesh coils and sub-ohm coils.
How Proper Priming Extends Coil Life
Priming isn’t just about preventing burnt hits — it’s about maximizing your coil’s lifespan.
When your coil’s cotton burns, it loses absorbency, causing uneven saturation and quicker degradation. Properly primed coils maintain consistent e-liquid flow, reducing gunk buildup and ensuring cleaner vapor over time.
A single well-primed coil can last up to twice as long as an unprimed one, saving you money and improving your overall vaping experience.
Frequently Asked Questions (FAQs)
Because it prevents dry hits, improves flavor, and extends coil life by ensuring full wick saturation.
You’ll likely burn the cotton on the first puff, resulting in a harsh burnt taste and a ruined coil.
Wait 5–10 minutes for regular e-liquid, or 15–20 minutes for thick, high-VG juice.
Yes. Over-saturating can flood your coil and cause gurgling. Make sure the cotton looks wet, not dripping.
The cotton should appear darker and moist through the wicking holes, and you should feel smooth vapor with no burnt taste on your first few hits.
Prime properly, use moderate wattage, and clean your tank regularly to prevent coil gunk buildup.
Conclusion: Make Every Coil Count
Priming your vape coils properly takes just a few extra minutes — but it saves you weeks of frustration, burnt cotton, and wasted e-liquid.
A well-primed coil gives you:
-
Better flavor
-
Smoother vapor
-
Longer coil life
So, the next time you install a new coil, take your time: saturate the cotton, let it rest, and start at low wattage. Your taste buds (and your wallet) will thank you.
Got your own coil priming tips or questions?
Share them in the comments below, and don’t forget to subscribe to our newsletter for more vaping guides, device tips, and expert maintenance hacks every week.