A Complete Guide to Prevent Burnt Hits and Extend Coil Life
You’ve just installed a fresh coil, eager to enjoy rich, flavorful clouds — but after a few puffs, all you get is a harsh burnt taste.
Sound familiar?
That frustrating experience is exactly why priming vape coils matters. Whether you’re new or experienced, knowing how to prime a vape coil properly completely changes your vaping experience.
This vape coil priming guide will show you exactly how to prime, how many drops to use, how long to wait, and even advanced priming techniques used by pros.
Quick Navigation
- What Is Coil Priming?
- The Science Behind Priming Vape Coils
- How to Prime Vape Coil Properly (Step-by-Step)
- Common Coil Priming Mistakes to Avoid
- Advanced Coil Priming Techniques
- How Proper Priming Extends Coil Life
- Frequently Asked Questions (FAQs)
- Conclusion
What Is Coil Priming?
Coil priming is the process of saturating your vape coil’s cotton wick with e-liquid before use. This prevents dry hits, burnt cotton taste, and early coil burnout.
Priming ensures:
-
Proper absorption
-
Even e-liquid distribution
-
Smooth vapor
-
No burnt coil flavor on first puff
Skipping priming usually leads to new coil tastes burnt instantly, one of the most common beginner mistakes.
The Science Behind Priming Vape Coils
When you fire your device, the coil heats instantly.
If the cotton is dry?
It scorches — causing:
-
Burnt taste
-
Permanent wick damage
-
Rapid coil degradation
Proper priming prevents:
-
Dry spots in the wick
-
Dry hits
-
Burnt coil flavor
-
Hot spots on mesh coils
This is why priming mesh coils and ceramic coils is especially important.
How to Prime Vape Coil Properly (Step-by-Step)
Follow these steps to avoid dry hits and burnt taste on a new coil:
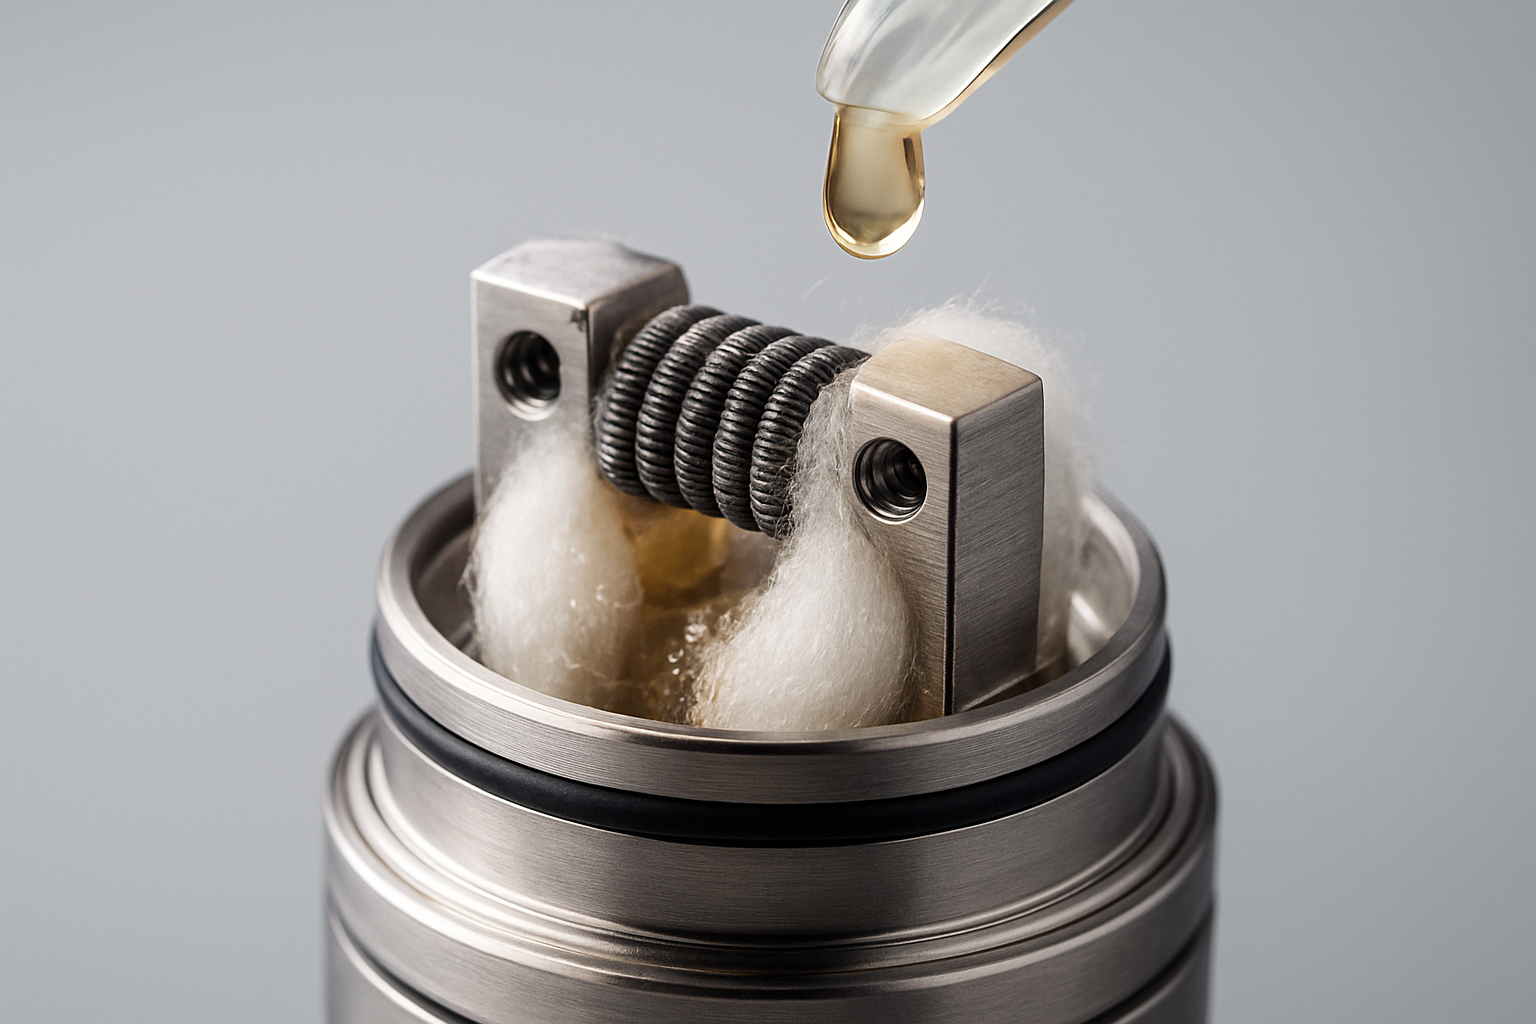
Step 1: Apply E-Liquid Directly to the Cotton
Look for the visible white cotton on the outside of the coil.
Apply e-liquid (usually 4–6 drops) until it looks saturated.
This works for:
-
mesh coils
-
sub-ohm coils
-
pod coils
-
ceramic coils
This step ensures the cotton pre-absorbs the liquid.
Step 2: Install the Coil and Fill the Tank
Fill your tank/pod with e-liquid and let the coil sit for:
-
5–10 min (regular e-liquid)
-
15–20 min (high VG e-liquid / 70VG+)
This is essential to fully saturate vape cotton deep inside.
Step 3: Start at a Low Wattage
Take a few primer puffs (inhale without firing).
Then vape at the lowest recommended wattage, gradually increasing.
This “breaks in” your coil slowly, preventing:
-
dry hits
-
burnt taste
-
premature coil failure
Common Coil Priming Mistakes to Avoid
Avoid these mistakes:
-
Firing your vape immediately after installing a coil
-
Under-saturating the wick
-
Using thick e-liquid without waiting longer
-
Skipping the break-in process
-
Chain vaping too soon
These mistakes often cause a new coil burning instantly or persistent burnt hits.
Advanced Coil Priming Techniques
Once you master basic priming, try these:
1. The Painting Method
Use a small brush to paint e-liquid on exposed cotton for ultra-even saturation.
2. Vacuum Priming Method
Close airflow → take strong pulls without firing.
This draws the liquid deeper into dense cotton.
3. Priming Ceramic Coils
Ceramic takes longer to absorb. Let them rest 10–20 mins before use.
4. Temperature Control Priming
Use TC mode for the first tank to prevent overheating during break-in.
5. Sub-Ohm Coil Priming Tips
Sub-ohm coils need more liquid and longer resting time due to high wattage demands.
How Proper Priming Extends Coil Life
(Optimized for: how to make vape coils last longer, extend vape coil life, keep vape coils from burning out)
Proper priming prevents burnt cotton — the #1 cause of early coil death.
Benefits:
-
Longer coil lifespan
-
Less gunk buildup
-
Better flavor consistency
-
Reduced e-liquid waste
-
No burnt taste
A well-primed coil can last twice as long, saving money and improving performance.
Frequently Asked Questions (FAQs)
Because the cotton is scorched — usually from not priming your coil.
It wasn’t primed long enough or the wattage was too high.
5–10 minutes for regular e-liquid, or 15–20 minutes for high VG.
Generally 4–6 drops per wicking port.
Prime your coil, avoid high wattage, and let the cotton re-saturate between hits.
Prime properly, clean your tank regularly, and avoid chain vaping.
Conclusion: Make Every Coil Count
Priming your vape coil takes just a minute—but it prevents burnt hits, weak flavor, and low vapor. A properly primed coil lasts longer, wastes less e-liquid, and delivers smoother, stronger hits every time.
Still getting weak hits or burnt taste? Drop a comment below with your device—I’ll help you fix it.
Want more vape tips, performance guides, and device recommendations? Join our newsletter for regular updates..