Understanding the “No Atomizer” Error and Proven Fixes for Your Vape Device
<
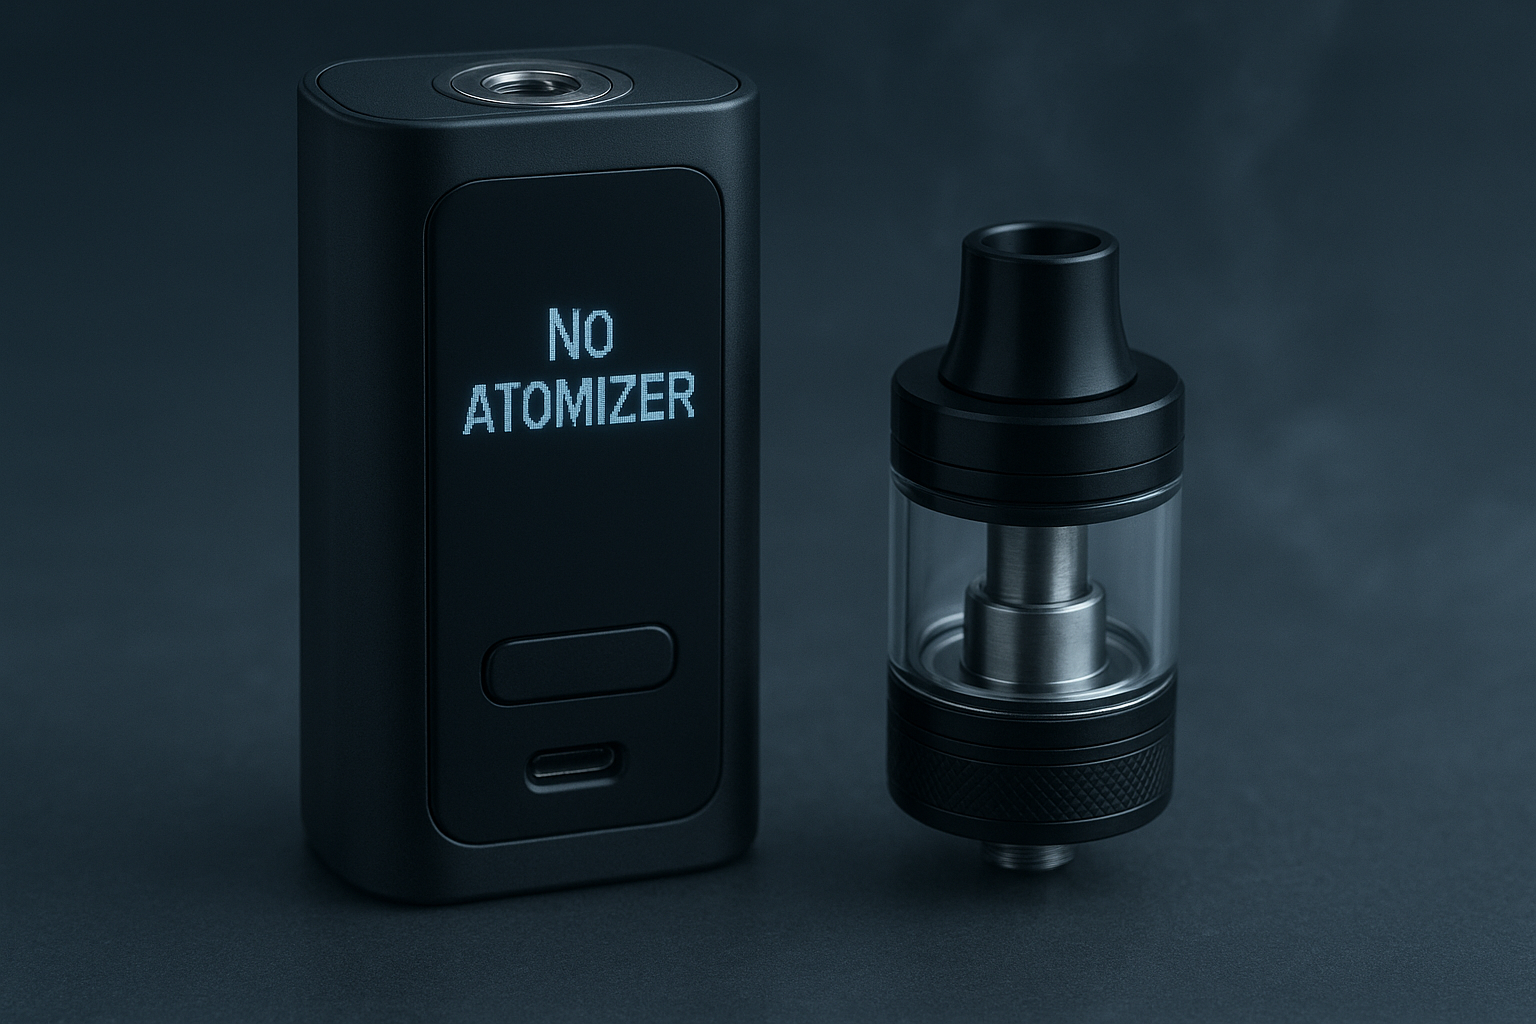
You grab your vape, press the fire button — and your device flashes “No Atomizer.” Annoying, right? That message means your mod can’t detect the heating coil (the atomizer). Without a recognized atomizer, the vape won’t fire.
Below is a practical, step-by-step guide that explains what “no atomizer” means, the common causes (from a loose 510 connection to a bad coil), how to fix it, and how to prevent it from happening again.
Quick Navigation
- What Does “No Atomizer” Mean?
- How to Fix “No Atomizer” — Step-by-Step
- Extra Troubleshooting Tips
- Preventing “No Atomizer” Errors
- When to Seek Professional Help or Replace Hardware
- Frequently Asked Questions (FAQs)
- Final Thoughts
What Does “No Atomizer” Mean?
“No atomizer” (also seen as no atomizer error or vape says no atomizer) means the mod isn’t detecting the atomizer — usually because the electrical connection between the mod and tank/coil is interrupted.
The device checks for a stable circuit before firing; if it can’t find one, it shows the error to protect both the device and you.
How to Fix “No Atomizer” — Step-by-Step
Step 1 — Check the Tank and Mod Connection
A loose tank is the easiest culprit. Gently screw the tank onto the mod so it’s snug (don’t over-tighten — that can damage the 510-connection pin). Check if the no atomizer message disappears.
Step 2 — Clean the Connection Points
Regular cleaning of your vape tank and threading prevents residue buildup that disrupts proper contact.
Action:
-
Unscrew the tank.
-
Wipe the 510-threading on both the mod and tank base with a dry cloth or cotton swab.
-
For stubborn gunk, dampen the swab with isopropyl alcohol, then dry completely.
This often fixes the atomizer not detected problem.
Step 3 — Inspect and Reinstall the Coil
An old or badly installed coil is a common cause of vape coil not detected issues.
Action:
-
Disassemble the tank and unscrew the coil.
-
Inspect for burn marks or broken wire. Replace if burnt.
-
If it looks fine, re-screw it tightly so it makes full contact.
If your vape still says no atomizer, try a brand-new coil — some faulty coils look fine but won’t register.
Step 4 — Check the 510-Connection Pin
If the 510 pin gets pushed down, your mod may fail to detect the atomizer — so always check the pin’s position and make sure your vape isn’t overheating or under hardware stress.
Action:
-
With the tank removed, gently test the springiness of the pin (using a non-metal tool).
-
If adjustable, slightly raise it with a small flathead screwdriver — be very careful not to damage the mod.
Step 5 — Test with Another Tank or Mod
To isolate the issue:
-
Put your tank on a known-working mod.
-
Put a known-working tank on your mod.
This helps confirm if your vape mod is not reading your tank or if it’s the coil/tank itself.
Extra Troubleshooting Tips
-
Atomizer short or atomizer short fix errors indicate a short circuit — replace the coil and inspect for stray metal bits.
-
For vape pen no atomizer models, try swapping cartridges or cleaning the contact pads.
-
Intermittent detection often means a loose 510 connection or damaged threads.
Preventing “No Atomizer” Errors
-
Clean your 510 connection regularly.
-
Don’t overtighten the tank — snug is enough.
-
Replace coils as soon as flavor or vapor weakens.
-
Avoid drops that could bend the 510 pin.
-
Always use quality coils compatible with your mod.
When to Seek Professional Help or Replace Hardware
If the problem persists despite all fixes, it could be a sign of a faulty or underlying hardware issue that needs professional attention.
Consider:
-
Contacting the manufacturer (if under warranty)
-
Replacing the tank if threading or base is damaged
-
Visiting a trusted vape shop for a quick diagnosis
Frequently Asked Questions (FAQs)
Usually because of a dirty or loose 510 connection, a bad coil, or a pushed-down 510 pin.
Clean the connection, reseat or change the coil, and check the 510 pin. If all else fails, test with another tank or mod.
Yes, faulty coils may not complete the circuit even if they look fine.
The same process applies: check the connections, clean, inspect the coil, and test the 510 pin.
Tighten snugly, check pin height, and ensure threads aren’t stripped. Replace parts if damaged.
Use a dry cotton swab or cloth. For gunk, use isopropyl alcohol and let it dry fully before use.
Dirty contacts, bad coils, or a loose or pushed-down 510 pin.
Burnt taste, no vapor, reduced performance, or repeated no atomizer messages.
Final Thoughts
A “No Atomizer” error is one of the most common — and easiest — vape issues to fix. With a bit of cleaning, inspection, and testing, you’ll often be back to vaping in minutes.
Regular maintenance prevents most connection issues — and keeps your vape performing like new.
Still getting the “No Atomizer” error?
Don’t give up! Try the fixes above and share your experience below — your tip might help another vaper out.
Join our newsletter for more quick vape fixes, beginner guides, and product recommendations straight to your inbox.
Have a trick that worked for you? Drop it in the comments! We’d love to feature your tip in our next article.